


Enable the Recycle Bin on external hard drives and USB flash drives to prevent accidental deletion of files stored there.
Accidentally deleting a file stored on your computer’s internal drive is nothing short of dramatic. Fortunately, you can restore it by going to the trash. All items that you delete from your hard drive are stored in this default folder. In fact, if these items no longer appear in your directories, they are still physically on your computer, inside a hidden directory, until you decide to empty the Trash.
If this recycle bin is very practical, because it serves as real protection, unfortunately it does not cover files deleted from external storage devices such as USB keys and external hard drives. However, there is a solution to this problem. By modifying a value in the Windows registry, you can choose to include external storage devices so that they also have the Recycle Bin. This is actually a hidden directory located on the device where deleted files will be stored, visible from the Windows 11 Recycle Bin.
1. Create a restore point
Before performing any operation in Windows Registry Editor, it is highly recommended to create a restore point. Thanks to this, in the event of any problem, you will be able to easily restore your PC to the last known working configuration.
2. Open the Registry Editor
Now open Windows Registry Editor. To do this, use the keyboard shortcut Windows + R. Then in the window Implement that appears, write regedit And validate by pressing the Enter key on your keyboard.
3. Go to the registry key to edit
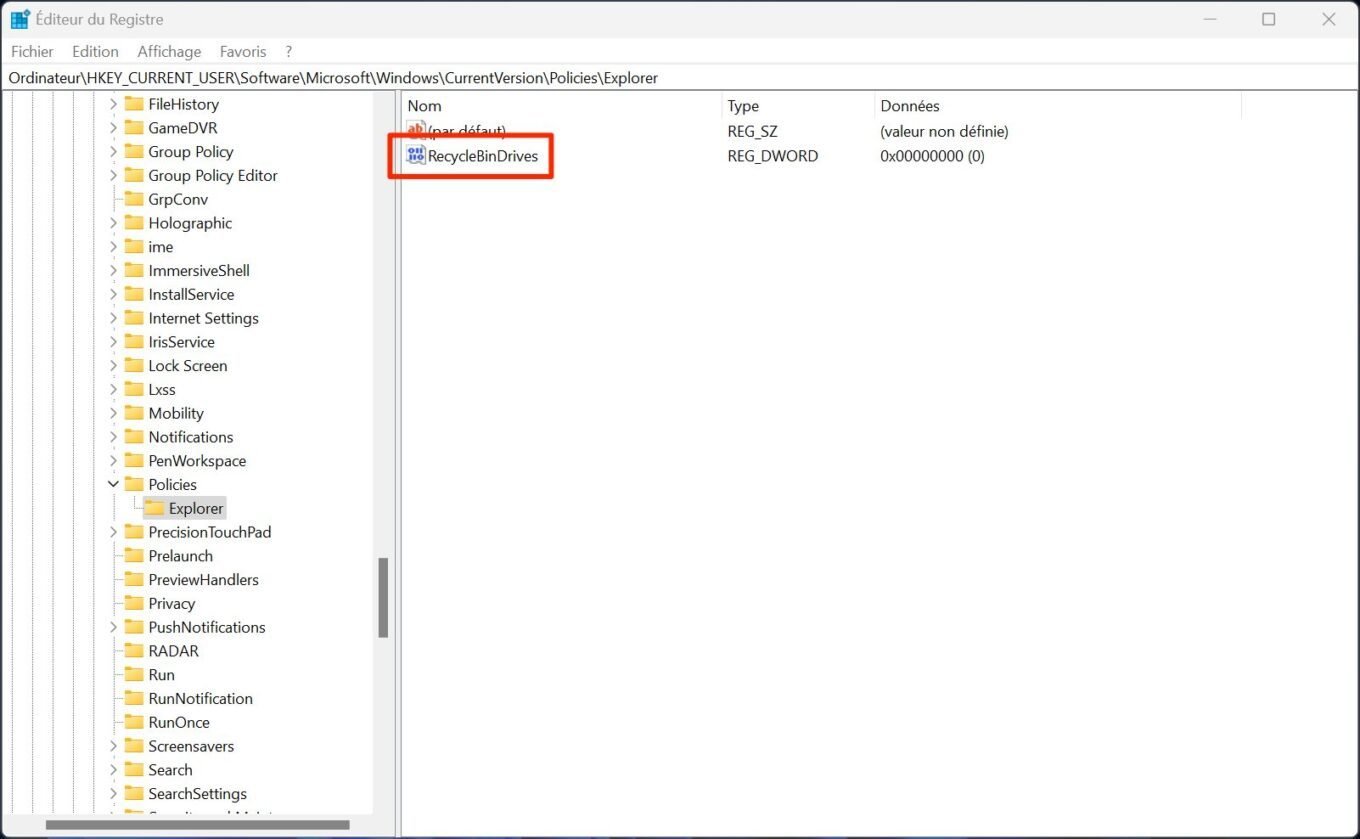
In the Registry Editor address bar, copy and paste the following path:
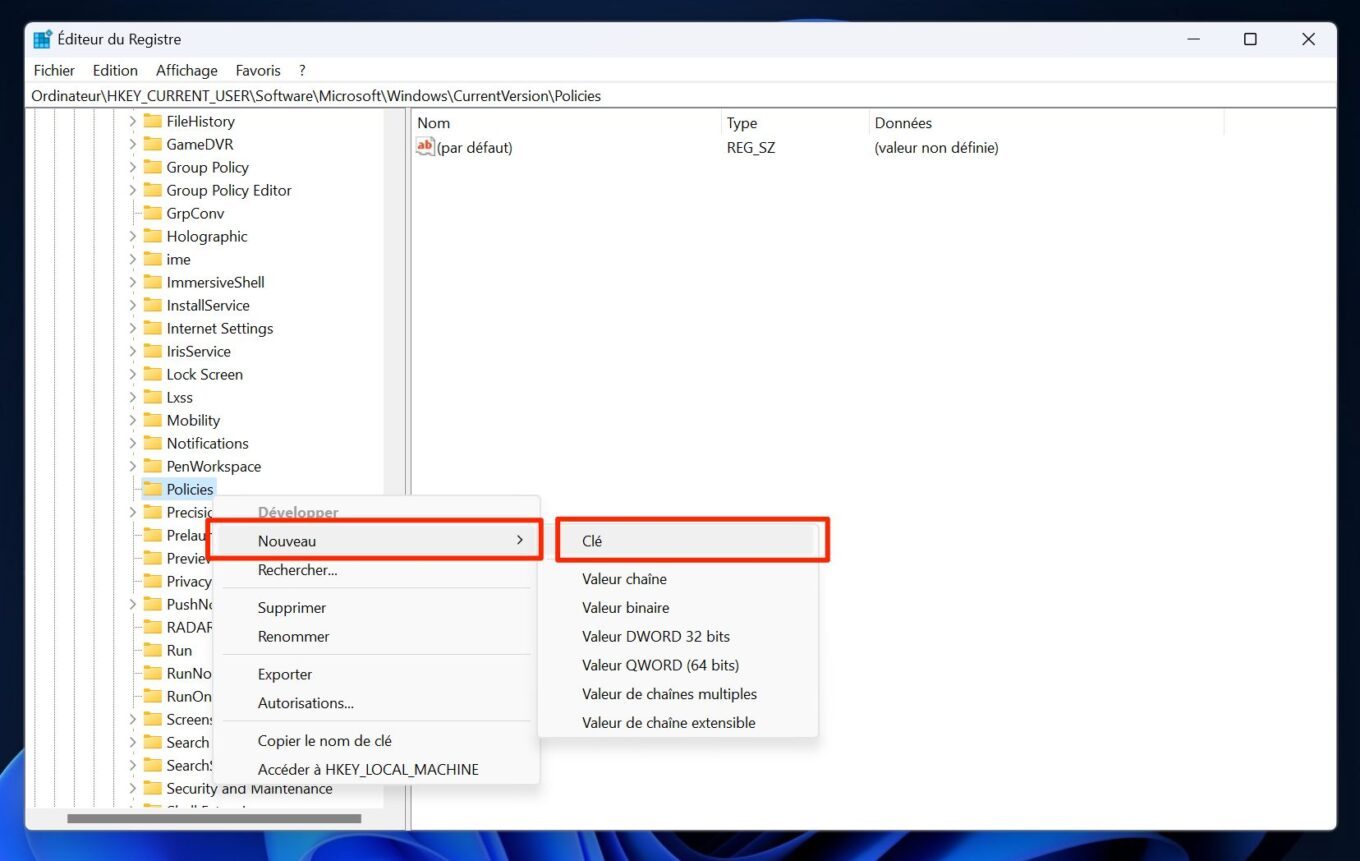
HKEY_CURRENT_USER \ SOFTWARE \ Microsoft \ Windows \ CurrentVersion \ Policies \ Explorer
If you do not see any clues Explores in the directory Policies, you will need to create it. To do this, make a file Right-click on the Policy directorythen in newClick on key.
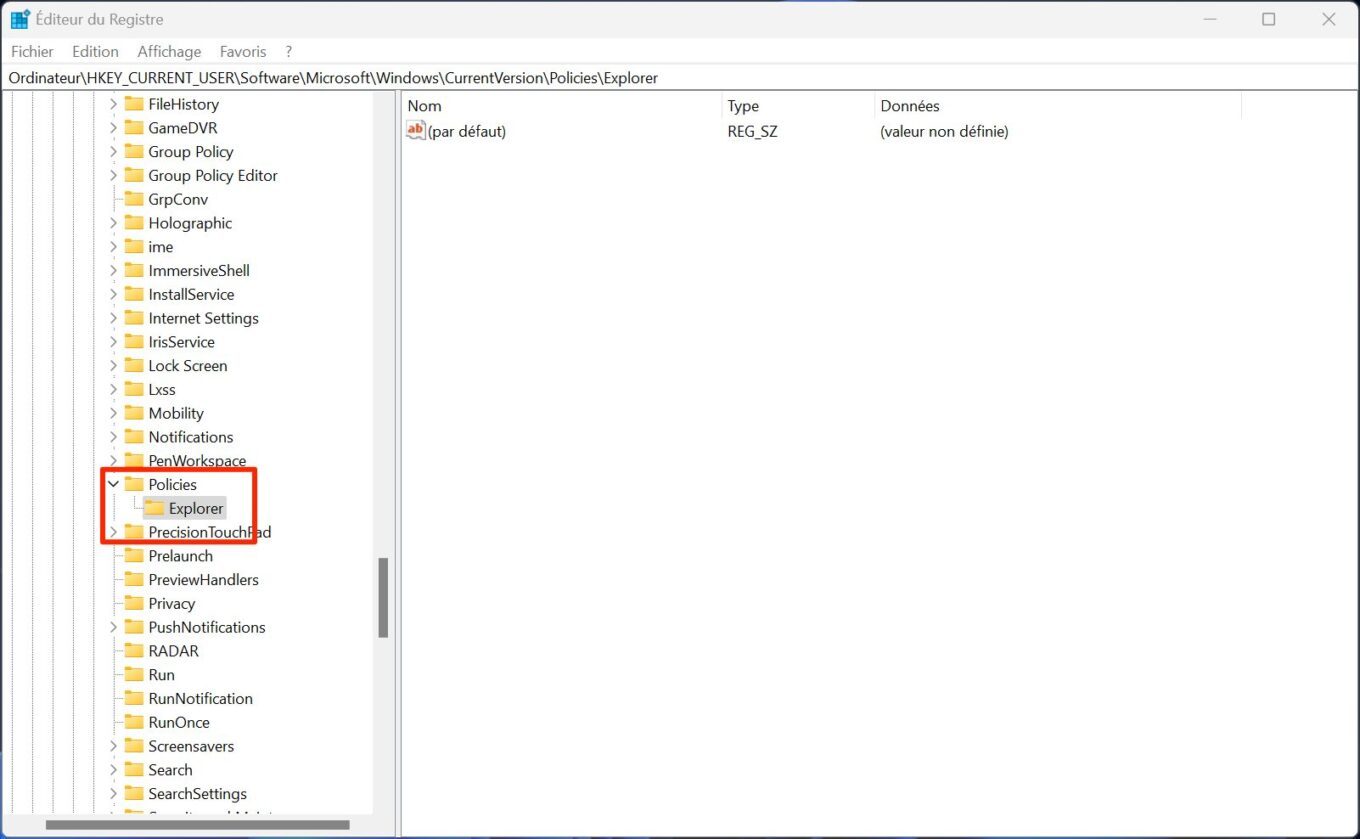
You must then create a new key (in the form of a folder) in the folder Policies. Right-click on it, and choose rename label it Explores.
4. Create a new value
Double-click the directory Explores the one you just created to make sure you are placed in it. In the right window, right-click, then on newHe chooses 32-bit DWORD value.
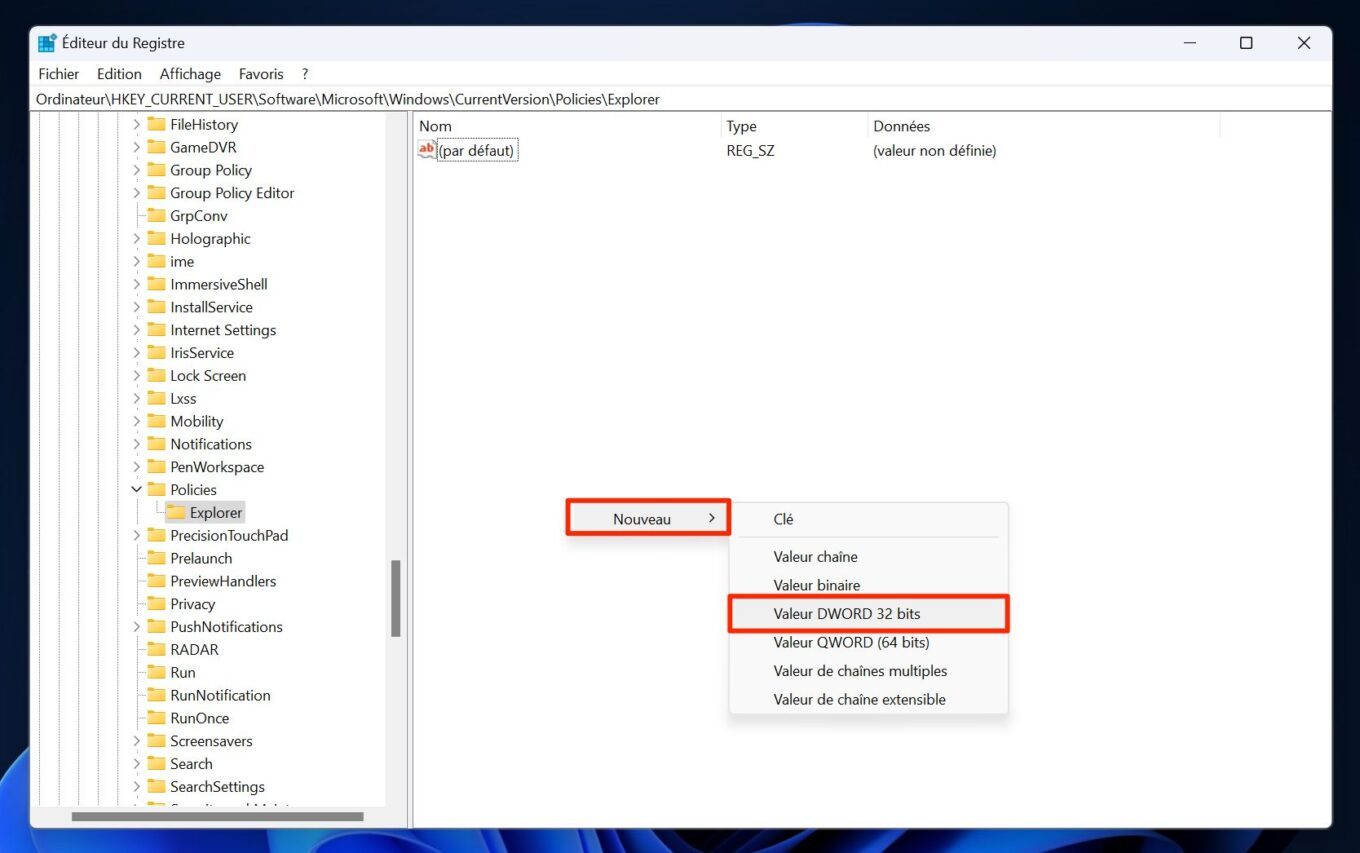
Then name this value RecycleBinDrives.
5. Change the value
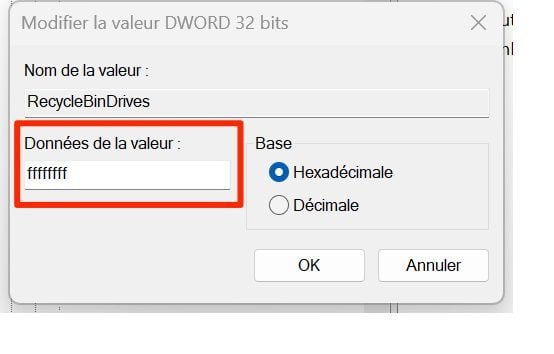
Now double click on the value RecycledBinDrives you just created, then in the window that appears, replace the value 0 in the value data field, with ” ffffffff »(eight times the message F). Then click Yes To save your changes.
6. Restart your computer
You can now restart your computer for the changes to take effect. To verify that processing is taken into account, insert a USB key containing files onto your device, then delete an item. Now open the trash. The file you just deleted from your USB drive should be there. You can then restore it to get it back.

“Hardcore beer fanatic. Falls down a lot. Professional coffee fan. Music ninja.”
More Stories
Why does your cell phone get hot and what to do when it happens?
Canadian SMEs are moving from curiosity to action on AI
Secret earthquakes have been discovered in Montreal